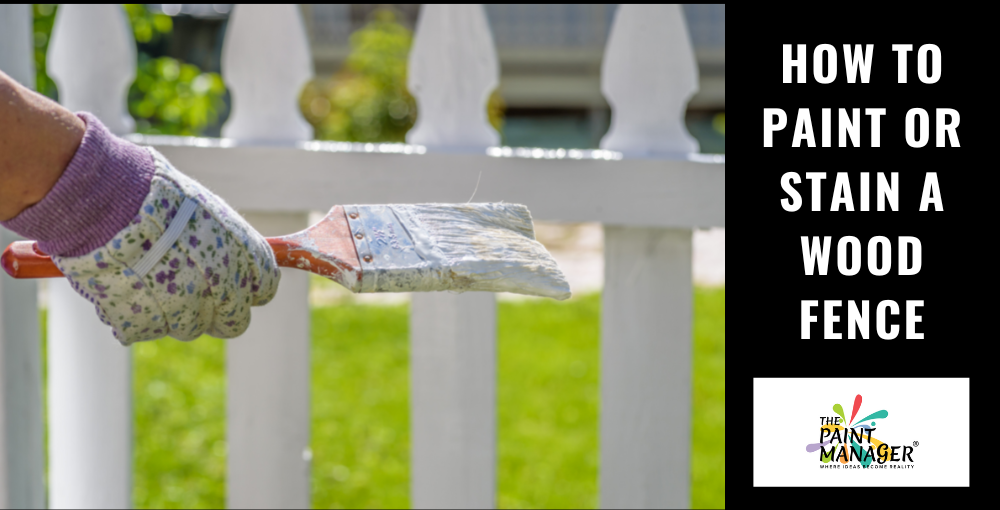
Every homeowner wants their house to be beautiful. But for those who have a wood fence, there is sometimes a tendency to neglect its appearance. Whether your property is a small city lot or an acre, a wood fence comprises a substantial amount of surface to maintain. However, it’s not only a matter of improving curb appeal, but keeping up your wood fence with a fresh coat of paint or wood stain improves its condition and extends its useful life.
While fences are not subject to as much wear and tear as a deck, for example, Central Florida’s intense sun, summer heat, heavy rains, and insects (in fences made of untreated wood) take their toll over time. According to HGTV, experts recommend repainting or restaining every two to three years, but a better way to determine your need is to check for beading. On a stained and sealed fence, if water no longer beads up on the surface, but instead soaks in, it may be time. Check painted surfaces for cracks, chips and wear.
Painting or staining your fence may not be high on the list of home maintenance chores you look forward to, but being proactive and not waiting until it’s the neighborhood eyesore will make the task easier.
On the other hand, you might be an eager do-it-yourselfer ready to tackle the challenge! Whatever the case, knowing which option is better for your fence – as well as the proper technique for preparation and application – will produce the great result you want. So let’s start at the beginning!
Making the Choice between Painting or Staining Your Wood Fence
There are a few factors to consider in making this decision. If your fence is new, you literally have a blank canvas to work with. However, keep in mind the following:
The architectural style of your house – Traditional-style homes are better complemented by a painted fence. Think of the classic white picket fence of a bungalow, cottage or Colonial style home. Contemporary and rustic-style homes are usually set off better by a stained fence.
Your homeowners association (HOA) – If you live in a community with an HOA, there are typically strict regulations regarding exterior house colors. Check before choosing to be sure you comply. Don’t risk staining when paint is required for fencing – or vice-versa – and confirm which colors are permitted.
If – as is more common – you’ll be repainting or restaining – you could see this as an opportunity to go in a different direction. But the reality is that painting over stain is somewhat easier, as doing the opposite requires stripping the paint and prepping the wood to accept stain. So to some degree, the existing treatment determines which you’ll use. That being said, the following are the advantages and disadvantages of each:
Painting a fence – As Matt the Painter notes, one of the biggest benefits of paint is its variety. Paint comes in many colors and finishes. As a result, you have more room to be creative with the presentation of your fence. You can opt for a matte or glossy finish to add to the aesthetic appeal of your house. Still, be aware of neighborhood standards. If surrounding homes have that sweet white picket fence, think twice about choosing an over-the-top color. As another plus, paint dries faster than stain, which can come in handy if you are on a tight schedule.
However, using paint has its share of disadvantages. Paint can be expensive, which will push your budget higher. Since it requires a primer as a base and multiple coats to properly cover the fence, you are likely to require a higher quantity of paint to complete the job. It is also less durable than a stain and can chip under extreme weather conditions.
Staining a fence – Staining a fence can be a great option if you are looking for durable coverage, as stain absorbs into the wood. As a result, it lasts longer and is not at any risk of being washed or chipped away. Fence stain is also significantly less pricey compared to paints. Therefore, if you want a budget-friendly solution to protecting your fence, staining should be your choice.
One possible downside is that staining your fence offers fewer options in terms of colors or textures. Stains are typically available in natural colors. Again, this can be an advantage if your home is more modern or rustic in style, or located in a wooded area with plenty of trees. In addition, a fence stain takes a longer time to dry and can be inconvenient if you are in a rush to complete the project due to time or weather conditions.
So, if you are looking to enhance the aesthetic value of your fence and don’t mind spending a little extra, painting it would be the better option. However, if longevity and a budget-friendly price are your primary concerns, you should opt for staining your fence. In either case, use a high-quality paint or fence stain that is UV-resistant for long-term protection against the elements.
Whether you choose to paint or stain, newcomers to Central Florida need to be aware that the months of June through August are known as “rainy season” or “monsoon season.” As you can expect almost daily afternoon thunderstorms, avoid any exterior paint or stain job during that period. Late spring and mid-fall present more favorable weather for such projects. Even then, pay attention to the projected weather forecasts while planning!
Preparing the Fence and the Surrounding Ground
As is the case with any paint (or stain) job, preparation is key to achieve the best possible result. True Value offers the following advice:
- Clean the surrounding area: Remove leaves, grass or weeds along the base of the fence by mowing, raking, weeding by hand or spraying a weed killer. Place a drop cloth below or next to the fence to catch debris or dripping paint.
- Prepare the fence itself: Clean, scrape and sand your fence with medium-grit or fine-grit sandpaper. You may want to use a pressure washer to clean the fence and blast off loose paint. You can also use a garden hose with a power nozzle, a scrub brush and a solution of detergent and water. Use a paint scraper to finish removing remaining loose paint, then use a power sander to blend any raised paint edges into the surrounding areas. Sponge any mold or mildew spots with a 50/50 solution of bleach and water to keep mold or mildew from growing back. Also be sure to check your fence for termite or insect damage. If you find insect activity, replace the damaged wood.
- Safety first: Always wear gloves and a face mask when sanding and working with toxic chemicals – even when outdoors! If using a paint sprayer, wear safety glasses and a dust mask or respirator.
Fence Painting Techniques for a Beautiful Result
If you are the proud owner of a house with a fence in Central Florida, using the right application techniques for paint or stain can help set off your property to perfection!
Applying paint with a roller or paint sprayer are options. If you choose a sprayer, use an airless model or rent a high-volume/low-pressure (HVLP) sprayer for greater control with less overspray. Use a paintbrush to catch drips and work paint into hard-to-reach areas. If you are opting for staining, use a stain brush, which holds more finish with less dripping.
HGTV provides the following application instructions. However, be sure to follow manufacturer’s directions for use, as well as precautions.
- Pour your coating into a bucket and mix thoroughly. Using a wide nylon or polyester brush (4-6 inches), begin dipping the brush into the paint and applying the coating. For best results, begin with any top trim or horizontal structures.
- Paint the vertical pickets, working from the top of the fence to the bottom. If using a roller, back-brush every couple of feet to ensure even coverage and avoid lap marks. If you are using a paint sprayer, work in the same method, but stop every few feet and use a wide brush to back-brush. This will prevent lap marks and better help absorb the coating into the surface. Continue in this manner until the entire surface is covered. Allow to dry completely, then add another coat, if necessary. Once you’re finished, remove any masking tape and the drop cloth.
- Allow to dry completely, then add another coat, if necessary. Once you’re finished, remove any masking tape and the drop cloth.
Now for the big question – should you do it yourself, or call a professional? As our blog post – “How to Paint a Wrought Iron Fence” – covers, those who have proven DIY experience may feel confident enough to take on this project. For most homeowners, however, leaving it to a professional painting contractor is well worth the investment. A professional has the experience and skill, as well as the proper supplies and equipment to get the job done right and safely.
Our team at The Paint Manager has been proudly serving Central Florida homeowners for more than 20 years with experienced, dedicated and professional services that include exterior and interior house painting, roof repair and cleaning, drywall repair, popcorn ceiling texture removal, cabinet refinishing and so much more!
Plus, become a member of The Paint Manager to receive a 15% year-‘round member’s discount. Contact us to learn more about our services and membership discount offer. We look forward to meeting you!