How to Paint a Kitchen

How to Paint a Kitchen

If your kitchen is looking a little drab and dated, you may be thinking about remodeling. But even a partial kitchen remodel is expensive – not to mention disruptive. Fortunately, there is a relatively quick and easy way to update the heart of your home at modest expense! A fresh coat of paint can work wonders in giving your kitchen a new look that makes it more bright, inviting and even trendy – if that’s your style!

One advantage of painting your kitchen is that unlike other rooms, the paintable areas are smaller. Compared to a living room, bedroom or hallway, a kitchen may have only one uninterrupted wall. Most of the kitchen space is covered with cabinets, backsplashes, a sink and appliances. However, the limited paintable areas do require more prep work and cleaning to achieve the desired smooth, professional-looking result.

You may notice that we’re leaving cabinets out of this blog post. Painting kitchen cabinets involves a completely different skill set, equipment and time requirements. Our blog post – “Should You Paint Your Kitchen Cabinets Yourself or Hire a Pro?” – covers this project in detail. Spoiler alert: We strongly recommend hiring a pro! As you’ll learn in the blog post, painting cabinets is much more complex than most homeowners assume, and it’s too easy to end up with cabinet doors that show drips and brush marks – or begin to blister and peel a few months later due to poor prep work.

Whether you decide to tackle painting the kitchen yourself or call a professional painter, this project gives you the opportunity to get creative and bring out a new side to your kitchen’s personality! That all starts with the paint color you choose! Before you get to the fun part, first determine the square footage of the walls that you need to paint. This will give you an idea of the quantity of paint that you need to buy.

Choosing the Right Color and Type of Paint for Your Kitchen

Your kitchen should look and feel good to make you want to cook. Moreover, your kitchen space gets a lot of attention, which is why it is important to choose your paint color wisely.

Whether you select a modern neutral, a nature-inspired color or a bright, cheerful color, your kitchen space should reflect your love of cooking, and be an inviting place where family and friends gather. The best kitchen paint colors will blend effortlessly with your kitchen flooring and cabinets. If you want a welcoming kitchen feel, opt for yellows or warm reds. However, if you want a breezy and sleek kitchen look, opt for neutrals and whites. Neutrals can work with other decor elements of your home well and give a more airy feel. HGTV offers great color ideas for kitchens in its blog post, which we invite you to read!

Choosing the right type of paint is more important when it comes to your kitchen space. Always opt for sheen or gloss-finish paint, as they are easy to clean and long-lasting. Choose the gradations of gloss wisely, as complete matte won’t be ideal for a kitchen. Wall areas without a backsplash can be stained by red sauce that bubbles up in the pot while cooking – as well as coated by grease and oil. Choose something in the middle – such as semi-gloss, sheens, or satin. Often people opt for high-glossy and lacquer finishes, as these are easy to clean and offer great kitchen visuals. But be careful. According to HGTV, “Glossier finishes tend to highlight imperfections in the wall, so this isn’t the best option if your walls have a few dents and dings.

Prepping the Kitchen

While the kitchen can be more difficult to paint than open spaces with fewer cabinets/obstacles to work around, in reality, it is easy to paint if done right. If you’re painting your kitchen walls as part of a complete kitchen remodeling project, Dengarden recommends painting the ceiling and walls before your countertops and cabinets are installed. After installation, you can go back and touch-up the walls where needed. Sequencing the work that way reduces the amount of prep work and cutting-in.

Assuming that painting is the only project that will be done, however, your focus will be on preparing the kitchen walls to ensure a clean, even surface. Home improvement expert Lee Wallender provides the following instructions in his article for The Spruce:

“Kitchens can build up grease in certain areas, so it’s best to thoroughly clean the walls with a degreaser prior to priming. Assume that areas above and around the stove, oven, and counters need to be cleaned with warm water and TSP (trisodium phosphate). Door trim usually can benefit from the TSP cleaning, too. Remove dust and cobwebs from the tops of baseboards and other trim with a vacuum and a damp cloth or tack cloth.”

If the walls have gloss paint, Dengarden advises mixing a stronger solution of TSP to dull glossy walls and improve adhesion of the new paint. Scrub the walls with a sponge, then rise with clean water. Mildew stains and mold can be eliminated with TSP, vinegar or bleach diluted with water. Do not mix vinegar with bleach. If your walls do have such stains, be sure the source of the mildew/mold has been eliminated, as both are serious health issues and will recur if the damage behind the wall that caused them isn’t repaired. Whether or not you need to remove mildew or mold, allow the walls to dry thoroughly before painting.

You may or may not choose to paint the ceiling. If the ceiling has a water stain from a roof or pipe leak, confirm that the source of the leak has been repaired before proceeding. Apply a stain-blocking primer, but don’t use latex, as it won’t cover water stains.

If necessary, patch and/or sand the walls. Nail pops and nail holes can be easily repaired using a good patching compound. Sand the walls using a drywall sanding sponge to eliminate imperfections and smooth the surface to enable the new paint to adhere better. If the kitchen walls are too glossy, sand them and use a bonding primer.

Apply painter’s tape to the trim and all other areas that will not be painted. Press firmly on the tape with your fingers to prevent bleed-through. Finally, cover your cabinets and countertops with 99-inch masking film. The plastic is long enough to cover most cabinets almost all the way to the floor. Cover the floor with canvas drop cloths, or a leak-proof floor protector.

Use the Right Technique When Painting Your Kitchen

Applying paint properly makes the difference between a professional-looking job and an amateur effort that you’ll be unhappy looking at for years to come (and that won’t impress potential buyers if you’re planning to sell your house soon). Our blog post – “Common Interior Painting Mistakes to Avoid” – provides a comprehensive list of major don’ts that are applicable to kitchen painting.  Here is a guide to correct kitchen painting technique:

Paint the ceiling first – If your painting project includes the ceiling, paint it first, as any drips will be covered when you paint the walls. Use an extension pole. The best extension pole length to use for painting a kitchen ceiling is one that extends eight feet. An eight-foot painting pole works great for rolling parts of the ceiling above cabinets and between can lights. The longer length lets you make wider roller passes with more reach and more control.

Apply primer, if needed – If a surface has already been painted and the paint is in good, clean condition, it will most likely not require priming. Unpainted drywall, bare wood, and painted surfaces in poor condition should be primed. Apply the primer with the roller on large areas and with the brush on areas too small to accommodate the width of the roller. Use a roller on the large expanses of wall and a brush for the little strips, such as between the backsplash and the cabinets.

Use a paint roller on large areas – Determine which areas are large enough to accommodate the roller. Pour a small amount of paint in the tray, soak the roller cover, then thoroughly roll out the excess. Roll the large spaces of the wall in a W-pattern, covering sections of about 4 feet by 4 feet. Bring the roller to about an inch or two of the painter’s tape.

Apply by brush where needed – Let the paint dry for about two hours. Dip the paintbrush in the paint and manually paint the areas that the roller could not reach. Avoid drips by minimally applying the paint and by re-brushing. Areas that were painted more than a few minutes before will likely already be filming over. Confine re-brushing to areas that were only recently painted.

Apply additional coats if necessary – Paint colors deepen and reach their full potential by being applied in two or even three coats. Allow the paint to dry for at least a couple of hours, then re-roll and re-brush the paint one more time.

Should You DIY or Call a Professional to Paint Your Kitchen?

This, of course, is a question only you can answer! To help you decide, Wallender offers this following wise advice:

“Painting a kitchen should be within the skill set of most DIYers, especially given the smaller scale when compared to other parts of the home. But you may want to have a paint contractor paint your kitchen if it is large, has a complex layout, or high ceilings. A professional painter can get to the out-of-the-way areas, plus they can address the often unusual geometry found in many kitchen spaces.”

We couldn’t have said it better ourselves – except to add that a professional will have the right experience, skill, equipment and supplies to make sure the job is done correctly and safely!  The Paint Manager has been proudly serving Central Florida homeowners for over 20 years with experienced, dedicated and professional services that include exterior and interior house painting, roof repair and cleaning, drywall repair, popcorn ceiling texture removal, cabinet refinishing and so much more!

Plus, become a member of The Paint Manager to receive a 15% year-‘round member’s discount. Contact us to learn more about our services and membership discount offer. We look forward to meeting you!

How to Paint a Front Door

How to Paint a Front Door

The first thing that people notice about your home is the front door. Make your entry door the star of your home’s exterior with the right color and type of paint. You can also add a pop of color to your front door to make it more welcoming while showing off your design skills. But how do you choose a front door color that is lively yet not too over the top? The Paint Manager is here with this guide to help you choose – and apply – the right color for your front door!

Choose the Right Type of Paint and Paint Color for Your Door

Your front door forms the first impression of your home in people’s minds, and affects how they feel about your house. Whether you plan on staying in your home or selling it, a front door that stands out for the right reasons adds a great deal to its curb appeal. Moreover, your front door has to withstand the elements every day, so you want the right type of paint to avoid peeling and fading. For example, according to Joe Cruz of Family Handyman, fiberglass doors need acrylic, polyurethane or epoxy paints that won’t weaken the integrity of fiberglass.

For doors made of other materials, Cruz recommends the following:

Semi-gloss acrylic latex paint This is one of the overall best types of paint for your front door. Many homeowners like it for its durability, color compatibility and easy clean-up. It’s great for steel, wood and fiberglass doors.

Semi-gloss latex enamel exterior paint and primer in one This eliminates the need for a primer coat. It works well for any type of door.

High-gloss oil-based exterior paint This paint is highly dynamic and resistant to cracking and chipping. It is ideal for wood or steel doors, but won’t work well with fiberglass doors. Also, unless your front door is extremely high-quality, a high-gloss finish will bring out its blemishes.

Water-based latex paint – This dries faster than oil-based paints. However, oil-based paints will prove to be more durable in the long run. Water-based latex paints are generally easy to work with and clean up quickly with water. Moreover, water-based latex paints can be found in no-VOC or low-VOC form, making them more eco-friendly.

According to HGTV, The most important thing to note is whether you have a latex- or oil-based paint. This is especially important for touch-ups, as you never want to paint oil over latex paint or vice versa. The type of primer you use also needs to match the type of paint you use (latex or oil-based).

Now that you know which type of paint to apply to which type of front door, let’s get down to choosing the right paint color!

The color of your front door should portray your unique personality and distinct style. Also, as colors have the ability to influence our mood, it is essential to choose a proper color for your front door. Your entry door color can communicate a subconscious message to your guests and create a welcoming, positive emotional reaction.

Quality Overhead Door offers this list of the most popular front door colors, and the psychology of each:

  • Red: A bold red entry door will help a home stand out. As a bonus, red is regarded as a lucky color in some cultures.
  • White: A white front door is ideal for traditional homes, and gives people an impression of an organized, well-maintained house.
  • Blue: This is one of the most calming options when it comes to painting your front door. The color conveys tranquility and peace. It also goes well with various colors.
  • Green: A harmonious hue, green is a key color found in nature. A green front door indicates a peaceful home with a friendly owner, and signifies a peaceful, welcoming environment.
  • Yellow: The color of sunshine, yellow denotes optimism and cheerfulness. A yellow-colored front door will attract the attention of your visitors immediately.
  • Purple: A pop of color can brighten up your mood as well as that of your visitors. A purple front door will signify a free spirit, and make your visitors smile every time they enter your house.
  • Black: As a traditional, elegant door color, a black front door shows passersby that the homeowner has refined taste. This dark shade suggests the interior of the home is equally sophisticated.

Tips for choosing the right color for your door:

  • Look at the outdoor environment of your home to draw some inspiration. The natural lighting, the color of the porch area, and the surroundings can help you decide the color of the front door.
  • Take your exterior design and home’s structure into account.
  • Consider the classics to never go wrong with your front door color selection. 
  • Make a monochromatic color scheme your best friend if you have a smaller home, as it will visually expand your home and make it appear larger than it really is.
  • Use the color wheel for reference. Better Homes & Gardens provides a helpful guide to using the color wheel to show which hues go together.
  • Introduce an elegant accent color throughout the door trim to pull together the rest of the exterior colors.

To help in the selection process, you can tape paint chips to your front door to understand how the color will look in natural light during different times of the day, and the overall design of your home’s exterior. If you have narrowed it down to two or three color choices, you may also purchase small samples of paint to perform a larger color swatch. Again, check out the color swatches that you have done at different times of the day to understand how the color looks when the light brightens or dims.

With your color selected, be sure you also choose the right time to paint! In Florida, this can be tricky, as there is actually a rather narrow window for exterior painting projects. Our blog post – “When is the Best Time of the Year to Have My House Painted?” – covers the challenges of exterior house painting in detail. The basic parameters are October through late March. These months are relatively dry, and Central Florida doesn’t have sustained periods of frigid winter temperatures. Pollen season starts in spring, depositing a thick, yellow layer that adheres to every stationary object – including houses. Hurricane season then quickly follows, running from June 1 through November 30. Summer also brings daily afternoon thunderstorms, giving house exteriors little chance to dry completely to be successfully painted.

Assuming you’re planning to do it yourself – and you’re confident you won’t get rained out or covered in pollen during the project – here are the steps to follow.

How to Prep the Front Door

The key to a long-lasting, attractive front door paint job is to properly prep the door. Painting over dirt, dust, cracks, holes, or peeling paint will significantly reduce the lifespan of the paint job.

There are two options for prepping and painting a front door: remove the door and place it on sawhorses or a folding table; or paint it in place. Whichever option you choose, Family Handyman provides the following preparation steps:

  • Scrape any loose or chipping paint using a paint scraper or putty knife.
  • Fill any dings or scratches with an all-purpose plastic wood filler.
  • Sand the entire door with 120-grit sandpaper, smoothing over any imperfections and flaws.
  • Vacuum or blow off all the dust and debris that may have collected. Wipe the entire door with a clean damp cloth.
  • Use painter’s tape to mask off any glass or edges of the door you don’t want paint on.

Front Door Painting Techniques

Start your front door painting by applying the primer, making sure to cover the entire door. You can use a roller to distribute the primer evenly. You may need to apply a second coat of primer to the areas where the initial primer application was thin.

Once the primer dries, use a paintbrush to cover up any details or trim work on the door. Next, finally, start painting the door. You can use a paintbrush, foam roller, or a low-nap roller for this.

If you want a nice hand-painted look, opt for a paintbrush. You can also use a roller first and then use a paintbrush while doing the final coat to attain this look. Make sure that the door is completely dry before you start reattaching the hardware (if you have removed it).

Taking the DIY approach to painting your front door can be successful if you have a good skill level and experience in home improvement projects. As you’ve learned, preparation, patience and a steady hand are essential to achieving a great result! Since your entry door is so important to making a good first impression, you want a professional-quality job.

If you’re not confident in your DIY skills – or would rather leave it to the pros – call The Paint Manager! We’ve proudly served Central Florida since 2000 with quality residential and commercial painting services. Our experienced team will use the right primer and paint for your door, seamlessly applied to make the perfect statement for your home!

Visit our website to learn about many other services we provide – including pressure washing, roof cleaning and stump removal. Become a member of The Paint Manager to receive a 15% year-‘round member’s discount. Contact us to learn more about our services and membership discount offer. We look forward to meeting you!

How to Texture Your Interior Walls

How to Texture Your Interior Walls

When it comes to home improvement projects, there aren’t many that don’t involve a good deal of expense and/or heavy labor. So if you’re wondering how you can quickly improve the look of your interior walls without making a big investment, texturing them may be the solution you’re looking for!

Wall texture is a product that is thicker than paint, yet thinner than drywall compound, although drywall compound can be used. Three main types are available – a ready-to-use roll-on product, dry mix (powder to be mixed in water) and spray (may be water- or oil-based). Products in a spray can are better suited for touch-ups to an existing wall texture, however. And while applying texture to one or more walls is relatively easy as DIY projects go, it still requires prep work and specialized tools that you may have to rent or purchase. That said, compared to other solutions, texturing can save you time and money – with the plus side of providing a stylish interior décor touch!

The Advantages of a Textured Wall Surface

As home renovation expert Lee Wallender writes for The Spruce, “Wall texture is often applied out of necessity … But wall texture does have the distinct advantage of being a quick method of finishing walls without the seemingly endless cycles of mudding, curing, and sanding drywall compounds. Wall texture can cover up imperfect drywall or mudding work, and it dries rapidly enough that you can begin painting just hours later.”

For this reason, texturing is ideal for concealing drywall repairs that leave visible seams. It also can be used to cover minor wall damage – such as gouges that don’t go through the drywall – as well as areas in which molding or wainscoting have been removed. While Wallender contends that most homeowners would prefer a smooth surface, achieving it involves the expense and upheaval of installing new drywall. Our blog post – “Types of Drywall You Need to Know About” – covers this topic in greater detail.

Wallender’s assumption could be just an expression of his own preference, as texturing offers a way to get creative and make a unique, stylish statement. Even if you’re not trying to conceal a flawed wall surface, texturing can create an eye-catching accent wall, or add dimension and character to a room.

Should you decide to take the plunge, there are some design principles to keep in mind. As you learn about the different types of textured finishes that follow, choose the finish that best complements the space. For example, comb or orange peel would be appropriate for an accent wall in a small-to-medium-size room, while knockdown or slap brush knockdown might be overwhelming.

Also, be careful if texturing more than one wall in a room. Again, keep visual proportions in mind, and avoid choosing a texture that calls attention to itself. You want the texture to work with all the other elements in the room, rather than be the first thing that you and others see!

Types of Textured Finishes

There are seven main types of textured wall finishes. Home improvement writer Timothy Dale and home renovation legend Bob Villa describe each in an article for Villa’s self-named website, as well as recommended preparation steps and application techniques.

Comb – This texture is one of the most basic techniques, allowing you to create lines of various widths and shapes. This technique is often used to produce a repeated series of rainbow patterns. It requires drywall compound, a roller and a drywall trowel that has evenly spaced teeth (or uneven teeth if you are going for a less organized pattern). Apply the drywall compound to the wall using the roller, then use the teeth of the trowel to gently apply lines in the wet compound.

Popcorn – Although popcorn texture ceilings have a bad reputation, this finish on a wall creates a different impression – especially after painting! If you intend it to be a true accent wall, a popcorn texture wall painted a different color from the room’s other walls will make it stand out in a good way. To create this finish, you need popcorn texture, an air compressor and a hopper gun.

Orange peel – This texture looks exactly as it sounds – it resembles the peel of an orange. Prime the walls so that the texture has a smooth, dirt-free surface to stick to. Use a hopper gun with an adjustable valve, a drywall compound and an air compressor.

Knockdown – This creates a unique, rustic pattern, akin to stucco. Knockdown can be achieved by adding a step to the orange peel technique: After applying an orange peel texture to the walls, flatten the peaks and bumps that form in the drywall compound using an 18-inch or wider knockdown knife. Smaller rooms will likely require a wait period of about 10 to 15 minutes after spraying before the peaks can begin to be flattened, while a larger room can probably be started as soon as you are finished spraying. Just be sure to begin flattening in the same area that you began spraying.

Sand swirl – This creates an artistic, free-form effect that isn’t overwhelming. Use a compound known as perlite (primer with sand mixed into it) and a 7-inch-wide paint brush. Hold the paintbrush by the base, as this will give you more control than holding the handle. Dip the brush a few inches into the perlite, giving it a wipe on either side of the bucket to remove loose drips. Start at the top of the wall, making a big loop with an open bottom. Each row of this swirl pattern will cover up the bottom of the previous row. 

Slap brush – The slap brush texture creates a random pattern of thin lines that add an eccentric flair to any room. This type of wall texture is a great choice if you aren’t confident with a spray gun. All that’s needed is a roller, a double crows foot drywall texture brush (also known as a slap brush) and drywall compound. Mix the compound with water until it reaches a thick paint consistency, then apply it evenly to the wall using your roller. Complete two 5-foot-wide sections before picking up the slap brush. Apply drywall compound to each side of the slap brush in a thin coating, and then begin slapping the first section of the wall with the brush. There shouldn’t be any specific pattern to the texture, so have fun and mix it up by twisting the angle of the slap brush in the air between slaps. 

Slap brush knockdown – This texture combines the slap brush technique with the flattening step of the knockdown texture to create a random pattern of flatter, wider lines, instead of peaked, thin lines. To apply this texture, you will need a roller, slap brush, knockdown knife and drywall compound. Using the slap brush technique, work your way around the room until each wall is evenly covered in a slap brush texture. For smaller rooms, wait 10 to 15 minutes before beginning to flatten the peaks using the knockdown knife. For larger rooms, you can begin flattening the peaks immediately.

How to DIY – But Call a Pro if You Need Help

You may have noticed that some of the application techniques that Dale and Villa recommend require sprayers or other types of equipment you might not feel confident using. Fear not! Shannon Cooper provides a simplified method in her article for 21 Oak. The basic steps follow. Please read the article in its entirety for complete step-by-step instructions.

Prep work – Applying texture to a wall is a messy process. Lay drop cloths on the floor and use plastic sheeting and painter’s tape to cover windows, trim and doorways. Pre-coat the wall by applying a layer of drywall primer or flat white latex paint, then let dry. This step is vital. Otherwise, the bare drywall will absorb the texture paint, negating all of your hard work.

Prepare the texture compound – Mix the texture material after the primer dries completely. Take a 5-gallon bucket and mix four parts of drywall and one part of water. Use the paint mixer attachment of your drill to mix thoroughly. The consistency should be like a thick pancake batter. You can also buy premade texture paint if you don’t want to make your own. Follow the manufacturer’s instructions, and stir the paint thoroughly before applying it to the wall.

Roll the texture on the wall – Adding texture to a wall must be done in two stages: rolling on the compound and, when that layer is partially dry, applying a second coat. Begin by filling the paint tray with the texture paint or handmade texture compound. Dip your roller into the paint, roll it out, and begin applying it to the wall. A standard roller cover will create a texture, but you may want to try a cover specifically designed for texture. If you’re using store-bought paint, follow all the manufacturer’s directions, as they may only recommend one coat. For corners and other areas that are difficult to reach with your roller, apply the texturing material with the flat face of a paintbrush.

After it dries, apply the texture again – It is crucial to know when to apply the second coat. Let the first coat dry halfway, then apply the second. To check how dry the texture is, press your thumb against the wall and remove it. Apply the second coat after the first coat dries to the desired level. Use a paintbrush to cover corners and crevices effectively.

Get the finish you want – As mentioned earlier, there are many types of texture. If you have the right tools, you can create a variety of finishes. Cooper describes how to create a knockdown finish, which looks like textured plaster. To achieve this effect, run a drywall knife across the surface with the blade held at a flat angle before the wall is completely dry. Once the wall is dry, those who used homemade drywall compound can seal the surface with primer and paint it with their chosen color.

Now that you know the many techniques for texturing walls, you may have answered your own question as to whether you can – or should – do it yourself, or hire a professional. While Cooper’s method can be accomplished by those with beginner-level DIY skills, those who want to cover more than one wall or use a different technique requiring specialized equipment – such as an air-compressor-powered electric sprayer – would be advised to call a pro. Also, a professional has experience in knowing the proper texturing compound consistency – plus has the relevant expertise, appropriate tools, personal protective equipment and assistance, if needed.

The Paint Manager offers experienced, professional application of wall texturing, as well as drywall repair. Our team has been proudly serving Central Florida homeowners for over 20 years with experienced, dedicated and professional services that include exterior and interior house painting, roof repair and cleaning, drywall repair, popcorn ceiling texture removal, cabinet refinishing and so much more!

Plus, become a member of The Paint Manager to receive a 15% year-‘round member’s discount. Contact us to learn more about our services and membership discount offer. We look forward to meeting you!

Hurricane Season is Here! Make Sure Your Property is Ready!

Hurricane Season is Here! Make Sure Your Property is Ready!

It’s once again hurricane season in Central Florida! If this is your first in the Sunshine State, Atlantic hurricane season runs from June 1 through November 30, with August and September typically the most active months. Forecasters at NOAA’s Climate Prediction Center — a division of the National Weather Service — predict a 65% chance of an above-normal hurricane season this year. Although our area has been spared a direct hit the past few years, it doesn’t pay to take chances when it comes to preparing your property to prevent or minimize hurricane damage.

Why You Need to be Prepared

Unlike tornados, hurricanes travel according to a trajectory that can be predicted with a good degree of accuracy – and even fast-moving storms usually give those in their path about 24 to 48 hours to either batten down the hatches or evacuate. While this may seem like a good amount of time, you don’t want to be scrambling to move outdoor furniture, planters, etc., indoors or to a more sheltered area while making sure you have enough batteries, flashlights and emergency provisions (a.k.a. “hurricane food”) to see you through a possible prolonged power outage. This also is not the time you want to be worried about that brittle old tree branch hanging over your roof!

While hurricanes tend to be the focus this time of year, it’s also the season for tropical storms – which have sustained winds of 39 to 73 mph and may or may not become a hurricane.

Hurricanes and tropical storms aside, our almost-daily summer afternoon thunderstorms are sometimes severe enough to wreak havoc on trees, landscaping and home exteriors – as well as cause flooding in low-lying areas or yards with poor drainage.

We at The Paint Manager want you to be ready if a hurricane hits Central Florida or nature unleashes its fury with other severe storms. In addition to following the steps recommended here, we encourage you to read our previous blog posts on this topic:

Check Your Roof, Exterior Walls and Screened Enclosure

Roofs are particularly vulnerable to hurricane damage. Mark Kaufman Roofing recommends having the roof inspected and any needed repairs taken care of promptly. “This might include getting damaged or missing shingles or tiles replaced, having missing metal panel anchors replaced, getting any flashing defects dealt with, and making sure that loose soffits, ventilation turbines and gable end/eave vents are properly secured. Have hurricane straps or truss tie-downs added in the attic to bolster the roof/wall connections and bracing installed if your roof has gable ends taller than 48 inches.”

Also be sure to clean out the gutters and repair any deficiencies – such as sagging or poorly-attached sections, or loose or poorly-placed downspouts. If your gutters are clogged, the backed-up water will sit on your roof, and the probability of water entering your house will increase.

Next, assess the condition of your home’s exterior walls. It is crucial to caulk any cracks you see. Left unrepaired, they can cause damage when breached by driving hurricane-force winds and rain. The most weather-resistant types of caulk are silicone, urethane and Elastomeric latex caulk. Other options include acrylic and latex caulk, with the latter being especially easy to apply.

Inspect each window and door, and reseal if needed. Florida’s high summer temperatures take a toll on caulk around these components, making it necessary to reseal them more frequently than in moderate climates. Ygrene recommends checking the caulk around the frame and glazing around the panes carefully.

If your home has a screened pool enclosure, Dulando Screen & Awning offers the following advice:

Brace your screen enclosure – When bad weather takes down pool screen enclosures, inadequate bracing is often to blame. Pool enclosure hurricane braces reinforce the structural integrity of the pool enclosure. Verifying that your pool cage has hurricane braces before a storm arrives can minimize damage.

Check your enclosure’s hardware – Screws are small, but they can have a major effect when it comes to pool enclosure hurricane safety. Florida’s high humidity allows rust to flourish, and rusted fasteners leave a structure weak. Checking that your enclosure is built with corrosion-resistant fasteners is a simple way to ensure that it has the strength to survive nasty weather.

Preparing Your Yard to Prevent Storm Damage

Paying attention to the condition of your trees and trimming branches and/or removing dead or declining trees should be done before hurricane season, but there’s still time if you act now. As mentioned earlier, heavy branches hanging over your roof can snap off in a hurricane and crash through your roof, or crush the top of your vehicle. Ditto for an uprooted tree. Branches also can become projectiles and crash through windows – yours, or a neighbor’s!

An article in TC Palm warns about a particular risk of waiting until a hurricane watch or warning is issued before pruning. “Trash pickups will be suspended and your trimmings can become dangerous airborne projectiles propelled by the storm’s high winds.”

Other tips from TC Palm include:

  • Call a professional – Trees trimmed by a professional arborist are far less likely to fall.
  • Thinning a tree allows wind to blow through its canopy, offering less wind resistance in a storm. Prune young trees to create a single leader, which will grow into a strong trunk.
  • Minimize damage to mature trees by removing weak branches and reducing limb lengths.
  • Hatracked trees become sails. Removing a tree’s canopy encourages bushy growth, making a tree top-heavy and wind-resistant. Hatracking also is illegal.
  • “Lifted” trees lead to broken branches. “Lifting” is a practice in which lower branches are removed for clearance underneath. It can cause branch breakage and makes trees top-heavy.

Short-term preparations involve moving patio furniture, grills and container plants indoors or to a sheltered area. TC Palm provides this important to-do list:

  • Take in hanging pots and baskets. Secure or take in pots from shade houses.
  • Secure young trees with additional stakes.
  • Don’t remove fruit. If you put it in a trash pile and the pile isn’t picked up, the fruit may fly around in the wind.
  • Tree-dwelling bromeliads, staghorn ferns and orchids can be secured with fishing line.
  • Take in or tie up piles of yard or construction debris.
  • Take in all garden furniture, grills, outdoor torches, string lights and other such items. (Do not sink furniture in the swimming pool.)

Being prepared for a hurricane can help you feel more confident, knowing you’ve taken every step to make your home safe and secure. If you need help getting ready, The Paint Manager has served Central Florida since 2000 with quality professional services that include roof repair, caulking, gutter cleaning and painting.

Visit our website to learn about the many other services we provide – including pressure washing, roof cleaning and stump removal. Become a member of The Paint Manager to receive a 15% year-‘round member’s discount. Contact us to learn more about our services and membership discount offer.

Should You Paint Your Kitchen Cabinets Yourself or Hire a Pro?

Should You Paint Your Kitchen Cabinets Yourself or Hire a Pro?

Kitchen remodeling can dig a deep hole in your pocket. In its annual Cost vs. Value report for 2019, Remodeling Magazine put the average for a midrange major kitchen remodel in the South Atlantic Region (Maryland, South Carolina, Florida, North Carolina, Georgia, Virginia and Washington, D.C.) at $66,196 and an upscale major kitchen remodel at $131,510. For those who want to freshen up their kitchen with economy in mind, painting the kitchen cabinets can provide an updated look that won’t break the bank. Those who really want to save money may be considering the DIY approach. Although there is no shortage of instructions and tutorials online, taking on this project can involve much more than you bargained for – and could go above your budget if you botch the job and need to call a professional painter anyway.

Regardless of which course of action you decide, you first need to determine if your cabinets can be painted. Solid wood doors are a definite “yes.” In fact, if they’re in good condition, they can be refinished with a wood stain that allows the grain and beauty of the wood to come through. Our blog post – “Cabinets – Don’t’ Replace, Refinish!” – covers this option in detail.

Other types of cabinetry materials are capable of being successfully painted. According to Real Homes, cabinet doors of melamine and other types of laminate (and even particleboard) may be painted, but additional steps are necessary to achieve a good result.

Look Before You Leap – The Pros and Cons of DIY Cabinet Painting

The detailed step-by-step instructions and video tutorials that home improvement centers provide online may give you a false sense of confidence in tackling this formidable project. Yes, this very blog post provides links to such websites. But when you visit, read between the lines of what you see, and compare it to an honest self-evaluation of your ability to do likewise.

Unfortunately, many people underestimate the following when deciding to take the DIY route:

  • The full extent of work involved – especially for projects requiring disassembly and reassembly.
  • The amount of disruption and inconvenience for household members during the project, assuming it takes longer than one day.
  • The ultimate cost – inexperienced do-it-yourselfers tend to buy the wrong materials/equipment/tools, or not enough – and/or don’t realize they need additional products or items until well underway because the video tutorial didn’t cover them. The project can be even more expensive if a professional needs to be hired to complete or correct the job.
  • The amount of time the project finally involves – inexperienced do-it-yourselfers don’t tend to factor in for unforeseen setbacks. Don’t assume that every step will go as smoothly as the video tutorial.

However, one factor that people too often overestimate is their physical ability to do the work. Every project demands some degree of strength, stamina and agility. If painting your kitchen cabinets is your first DIY rodeo, you may find it too demanding – even if you’re relatively young! And if you’re more young-at-heart, keep in mind that tasks you found easy to perform in earlier years may be more challenging now.

Assuming you’re going more on confidence than experience, there’s one final factor to consider: the result. Will you be satisfied with the outcome if your freshly painted cabinets show tell-tale brush marks, an uneven surface, paint drips, etc.? Or will you be disappointed that they don’t look as smooth and perfect as you’d envisioned? If the latter reaction is more likely, we highly recommend hiring a professional painter. Yes, we’re getting ahead of ourselves, but for all practical purposes, the odds are against you removing the cabinet doors, sanding them down and trying again.

It’s a different story if you’re experienced in home improvement projects demanding intermediate to advanced skills. Should this be the case, you’re more likely to have a realistic idea of the scope of the job – as well as the appropriate tools and protective clothing and equipment.

How to Paint Your Kitchen Cabinets Yourself

The full instructions for doing a thorough job are too long and detailed to be provided here. We therefore recommend you read the entire step-by-step process on Real Homes, as well as on the Lowe’s website. The overview is as follows:

Select the paint and gather the tools and materials The paint selection largely depends on the look you want for your kitchen. However, it also depends on the material you work on and your experience level. Buy the paint and primer at the same time. Also, be sure that you have all the materials and tools before you start work.                                                      

Remove doors and drawer fronts Before starting, remove the doors and drawer fronts that you intend to paint. If you can, remove all the handles and hardware. If you can’t, tape up anything you don’t want painted. If you want to change the handles, fill the holes with a wood filler, let dry, sand them properly and drill new holes for a smooth finish.

Clear out and clean your cabinets Empty your cabinets, then clean the surface with a trisodium phosphate (TSP) cleanser to remove grease and dirt. TSP is a toxic substance, so follow label instructions carefully.

Sand the surfaces – Cover your countertops, appliances and other areas you want to protect. Placing painter’s tape on the wall along the cabinet edges is helpful. Sand everything with a medium grit sandpaper to help the paint stick to the surface. Fold the sandpaper to get into the detailed areas on doors and drawers, and in the corners on the frames.

Prime the cabinets After sanding and cleaning, you need to add the first coat of primer. The choice of primer would depend on the material you are painting. For example, you can use a wooden primer or undercoat for wood doors and a multi-purpose primer or a specialist surface primer for laminate doors.

Add an even coat of primer to the surface and let it dry (this could take a couple of hours). For laminate and veneer doors, you can sand them once more. Sanding again provides them additional texture so that the paint adheres to the surface properly.

For a smooth, professional finish, two thin coats of primer are more effective than one thick coat.

Apply the first coat of paint After the primer dries, apply the first coat of paint. Make sure to stir the paint if it is highly pigmented. If you are painting with a brush, work in both directions to evenly distribute the paint. A thin layer is better than a thick coat. When dry, sand uneven surfaces (if any), then clean the surface completely.

Apply the second coat You can use your brush to apply the second coat. Make sure you cover all crevices. To finish, you can use a sponge roller, which will give you an even finish and hide any brush marks.

Let the doors dry Don’t be impatient. Give the paint not only enough time to be dry to the touch, but to cure before reassembling the cabinet doors – which is typically two to three days.

Reassemble the doors After your kitchen cabinet doors dry, screw the handles back on and reattach the doors. 

Why You Should Hire a Pro – From a Professional’s Perspective

Jenny Robinson – manager of Paper Moon Painting, Austin and San Antonio, TX – brings an insider’s perspective to this matter. What follows are her own words. This is reprinted only in part. Her entire article is well worth your time to read!

“You can Google ‘Should I paint my kitchen cabinets’ and come up with all kinds of how-to’s geared to get clicks from DIYers everywhere. But as a manager for a painting contractor, I can’t tell you how many times I’ve been called to a home to estimate fixing kitchen cabinets that had been painted by a person who simply followed the steps from an Instagram post. It’s even worse if the info came from a DIY house flipper, who only cares about speed and turnaround time … I have directly reached out to several DIY home flippers to tell them that skipping sanding and priming is a sin when it comes to painting kitchen cabinets, only to be shrugged off. These encounters leave me wanting to shout from the rooftops, DO NOT DIY YOUR KITCHEN CABINET PAINTING! (I know it’s rude to shout, but I feel that strongly about it!)

“First of all, it’s going to take a serious time commitment. To paint your kitchen cabinets in a manner comparable to a professional paint job could require over two hours of time per cabinet door or drawer if you’re going to do it right, and several more hours for your base cabinets. (By the way, most kitchens have at least 50 cabinet doors and drawers, just to put this in perspective.)

“Our pro painters remove all doors and drawer fronts, they never paint cabinet pieces in place, that’s just asking for trouble (bad brushwork and paint ending up on your hinges, for starters). They also cover all surfaces not being painted with paper, plastic, and tape in preparation for the sprayed finish, and this step alone can suck up a full weekend if you’re not a pro.

“Our painters spray the paint finish with professional equipment, so the cabinet paint is never brushed or rolled, (brush marks and roller stipple, no thank you!). (If you want to see the full process, including video, we write about it here.)

“It takes a 2-man crew of our professional painters (seasoned veteran painters who do hundreds of these projects a year) an average of 3-5 days to complete the entire process, longer for larger kitchens. Anyone who says you can paint your whole kitchen in one weekend by yourself is grossly misinformed or doing it wrong. 

“First, you have to thoroughly clean your cabinets, but this is the part most people skimp on. Grease and oils from cooking or washing dishes have a way of permeating cabinets, and can be a pain to truly remove … Our professional painters first use a standard household degreaser, followed up by a more heavy duty industry specific chemical degreaser … What happens if you bypass, or half-step this part? You’ll achieve a beautiful finish… that will quickly chip off on those greasy areas.

“Next, we sand, but you’ve got to sand the right amount. You want to sand enough to rough up the surface, but not so much you cut all the way through to the raw wood. Then we apply the first coat of primer, then we sand again, then we apply the second coat of primer, then we sand again to get ready for the finish coat.

“Just like you wouldn’t DIY building a couch, you shouldn’t DIY painting your cabinets. Painting kitchen cabinets is vastly more complicated, more aggravating, and much more expensive to fix. I’m not saying you can’t successfully paint your own kitchen cabinets. Many DIYers can, and do. I am just asking you to think of the long-term ramifications. Just because the immediate result looks decent, does not mean it will be long-lasting. In fact, I would wager a hefty sum of money that if you skip sanding and primer, or if you use the wrong paint, then in six months or less you are going to have issues.”

The Take-Home Message

If you have successful, solid home improvement jobs under your tool belt, it may be possible for you to achieve an outcome that looks professional and will last for years to come. If not, follow Robinson’s advice and leave the painting to the pros.

Our team at The Paint Manager has been proudly serving Central Florida homeowners for 20 years with experienced, dedicated and professional services that include exterior and interior house painting, roof repair and cleaning, drywall repair, popcorn ceiling texture removal, cabinet refinishing and so much more!

Plus, become a member of The Paint Manager to receive a 15% year-‘round member’s discount. Contact us to learn more about our services and membership discount offer. We look forward to meeting you!

Spruce Up Your Home for Spring

Spruce Up Your Home for Spring

Even though winter is an abbreviated season in Florida, there is still a great deal of enthusiasm for the start of spring! Longer days mean more time to enjoy the abundant sunshine, reminding us of why we love living in Central Florida. So, of course, we want to bring brightness and color to our home, as well! We at The Paint Manager welcome spring, and offer some tips on how to spruce up your home – both inside and out – to make the most of this season of new beginnings!

Welcome the New Season with a New Look

Spring provides the perfect excuse to buy new accessories and accent furniture pieces to add pizazz without making a big, expensive investment. If you’ve been careful about venturing far outside your “bubble” this past year, many of these items can be ordered online to give your home – and your spirits – a lift! Here are some ideas provided by the décor pros at The Spruce, Style Blueprint and Houzz (via Forbes).

Interior Décor Tips

Add glass, acrylic or Lucite accessories to give your rooms a light, airy look. Table lamps, vases, bowls, small accent tables, tabletops and chairs of these materials have the additional advantage of making small rooms appear larger. Furniture items are more likely to be fashioned of acrylic or Lucite, which is the brand name for a premium-quality acrylic material.

Change out your throw pillows. If you still have the pillows that came with your sofa, it’s probably time for a new look, anyway! They’re a great way to introduce new colors and textures, which open possibilities for other accessories – such as table lamps – to pick up colors in this expanded palette. Interior décor professional Lauren Flanagan shares her knowledge about how to choose the perfect throw pillow in her article for The Spruce. On a tight budget? New throw pillow covers can do the job just as well!

While we may be getting ahead of ourselves, refreshing Florida room and patio furniture with new pillows and cushions is also guaranteed to give these areas a pick-me-up that will make them a more relaxing place to unwind!

Buy new lamps. An easy and relatively inexpensive way to literally brighten your interior décor is to purchase table and/or floor lamps. You can go for a contemporary style with clean lines, tropical island or transitional – the choice is yours! New lamp shades can also provide a fresh look.

Use baskets to organize. Using baskets provides two benefits at once: They are decorative elements in their own right, plus they offer neat storage for a wide variety of items. HGTV contributing writer Allie Holcomb King shares her ideas (with photos) for solutions that are both attractive and practical!

Rearrange your artwork, or buy new pictures. Create a gallery on a stairway wall, in a foyer or any wall that can accommodate it. You don’t need a big budget to buy art! Flea markets, antiques shops and yard sales are all good sources of framed art, as are national chain stores that specialize in home accessories and craft supplies. The latter two types of establishments offer online shopping, which gives you the advantage of seeing the art on the website and ordering it without having to visit the store.

Change the knobs on your drawers and cabinets. This is one of the easiest things you can do to give your furniture or kitchen cabinets a fresh look! However, make certain the new knobs will fit.

Buy a new shower curtain. Although a shower curtain is typically the most noticeable element of a bathroom, it’s too often treated as an afterthought. Take the opportunity to make a design statement with it – and create the illusion that you’ve updated your entire bathroom!

Paint furniture and small accessories. The great part about this tip is that you don’t have to buy anything other than the paint and paintbrush (and maybe a paint tray and sandpaper)! It’s perfect for bringing new life to old pieces that have faded into the background or just look a little tired. Painting larger items like a dresser will require more elbow grease and paint supplies than a basic chair or wood table lamp, but the effect will pay off! Get creative with color, finishes and effects – such as stenciling.

Because we at The Paint Manager always put safety first, be sure that the room in which you paint is well-ventilated and free of potential hazards. Follow label instructions for all products, and wear protective gear if using spray paint (which should only be done outdoors). The good people at Krylon provide this comprehensive list of spray paint safety tips.

Paint an accent wall. Feeling a little more ambitious? Make one wall of your living or dining room an accent wall by painting it in an attention-getting (but complimentary) color. According to interior design and color consultant Diana Hathaway Timmons in her article for The Spruce, “Accent walls are alive and well in the decorating industry. These easy and stylish color accents will always be popular because of their flexibility. You have unlimited paint options for your accent wall, as well as other surfaces and materials. Even the location of your accent wall is purely personal. Your home is unique, so your accent wall should be just as special.”

Again, be sure you have proper ventilation and take all safety precautions – as well as invest in the right ladder for the job! Don’t try to improvise with a step stool or – even worse – a chair. Keep children and pets out of the room while you’re working.

Refresh Your Yard and Patio

Just as with our interior décor tips, there are many inexpensive ways to refresh your outdoor area! Changing out patio chair and lounge cushions are a good start, and often necessary in Florida, where high humidity encourages mold and mildew growth. It may also be time for a new patio table umbrella. If your patio furniture is showing its age, repaint it! Just follow the precautions we noted earlier, and follow label instructions for any product you use. 

Buy container plants. Bright, flowering annuals in decorative pots can brighten up any area of the patio or front exterior that you want. Choose planters that complement your home’s architectural style and color, and – depending upon the color of your thumb – plants that are easy to care for. Garden enthusiasts will be willing to spend more time caring for higher-maintenance plants than those who just want a pop of color on their front porch or by the pool. Buy plants of varying heights and group together for additional visual interest.

Add landscape lighting. Given the variety of solar-powered landscape lights available at all price points, investing in lights to define pathways and plant beds need not be expensive. Our blog post – “Path Lighting Ideas for Safety and Beauty” – covers this topic in detail.

Add decorative lighting. Our blog post – “How to Use Outdoor Lighting as a Home Improvement” – provides plenty of ideas, such as using string lighting. Positioned at regular intervals, overhead string lighting can illuminate your courtyard. Or use café lights in a string formation. Lanterns also provide evening charm!

Consider a water feature – Adding a water feature (fountain) in your garden or patio can make your surroundings calm and serene, as well as creating an intriguing visual accent. Fountains are available in a variety of styles – from minimalist to traditional – at a price point for every budget. A self-contained fountain is typically less expensive and easier to install than one with a reservoir and pump, which requires a plumber to install.

Make Your Home Your Haven Throughout the Year

We hope our ideas help inspire you to bring more joy into your home and into your life! When you need home repairs or maintenance, The Paint Manager is here! At the present time, our professional contractors are only available for exterior jobs. Of course, we will let our valued members know when we are again able to provide our full range of services. As always, we appreciate your support! Feel free to contact us to schedule an appointment or ask questions, and stay safe!

Preventing Slip-and-Fall Accidents

Preventing Slip-and-Fall Accidents

If you read our blog on a regular basis, you’ve perhaps noticed the emphasis that we at The Paint Manager place on safety. While we usually feature home improvement topics in this space, we’re devoting this month’s blog post to preventing what the National Floor Safety Institute (NFSI) identifies as the cause of half of all accidental deaths in the home, and the leading cause of workers’ compensation claims – slip-and-fall accidents.

Although such accidents are usually known as “slip-and-fall,” tripping is included. Trips occur when your foot hits an object and you are moving with enough momentum to be thrown off balance. Both slips and trips cause you to fall.

Our team of home improvement professionals practice “safety first” at all times. We want you to be aware of how to be safe at home and at work, and make it a way of life!


Don’t be One of These Statistics

NFSI and the Centers for Disease Control and Prevention (CDC) provide the following disturbing statistics about slip-and-fall accidents.


Home slip-and-fall accidents:

  • One out of five falls causes a serious injury such as broken bones or a head injury.
  • Falls are the most common cause of traumatic brain injuries (TBI).
  • Half of all accidental deaths in the home are caused by a fall. Most fall injuries in the home happen at ground level, not from an elevation.
  • Each year, 3 million older people are treated in emergency departments for fall injuries.
  • Over 800,000 patients a year are hospitalized because of a fall injury, most often because of a head injury or hip fracture.


Workplace slip-and-fall accidents:

  • Fall fatalities are nearly equally divided between men and women. However, more women will experience a slip-and-fall accident. According to the Bureau of Labor Statistics, falls accounted for 5% of the job-related fatalities for women compared to 11% for men.
  • Slips and falls do not constitute a primary cause of fatal occupational injuries, but represent the primary cause of lost days from work.
  • Slips and falls are the leading cause of workers’ compensation claims and are the leading cause of occupational injury for people aged 55 years and older. 


Who is at Risk?

People ages 65 and up are at greatest risk for slip-and-fall accidents, as well as those who work in an industrial setting. According to Verywell Health, those with arthritis, osteoporosis and mobility problems are particularly susceptible. As we will cover later, people of all ages and occupations can be susceptible to injury from these causes if they perform outdoor home maintenance or yard tasks without the proper equipment, protective gear or know-how.


Preventing Slip-and-Fall Accidents at Home

Verywell Health provides a comprehensive list of hazards in every room of the home, and how to prevent them. We recommend that you bookmark this linked page or print it out for easy reference. Some of the highlights follow:


Living room:

  • Clear clutter off the floor (pick up newspapers, books, shoes, toys, magazines, etc.).
  • Use care around low furniture (coffee tables, ottomans, etc.).
  • Anchor loose telephone, computer and electrical cords.
  • Secure or avoid area throw rugs.
  • Repair bulges in carpeting.
  • Take extra care with changes in the floor surface (such as when carpet meets tile floors).


Kitchen:

  • Wipe up spills immediately.
  • Use a sturdy step stool (not a chair) to reach top cabinets.
  • Use a non-skid rug in front of the sink.
  • Do not over-wax or over-polish floors.


Bathroom:

  • If you have issues with balance or mobility, install grab bars by the toilet, shower and tub. Towel racks, soap dishes, etc., are not designed to hold a person’s weight.
  • Use a shower chair and handheld showerhead if prone to falling.
  • Use extra care around soapy water.
  • Use non-skid bath mats by the shower and sink.
  • Use rubber mats or slip-resistant stickers in the tub.
  • Quickly clean up puddles.


Bedroom:

  • Keep shoes, clothing and other items off the floor.
  • If you have issues with balance or dizziness, sit upright at the edge of the bed for a minute or two before getting up to prevent falling.


Stairs and steps:

  • Always keep steps and staircases clear.
  • Keep stairwells well-lit.
  • Install sturdy handrails on both sides.
  • Add non-slip safety treads to steps.
  • Always keep one hand free to be able to use the handrail.
  • Never carry items that obstruct your view of the next step.
  • Don’t overload yourself. Carry smaller, lighter loads and/or make extra trips.
  • Take your time to decrease chances of misjudging a step.


Garage:

  • Clean up oily areas on the floor.
  • Keep items organized and out of the way.
  • Use a ladder to reach items stored on high shelves. See our section on outdoor slip-and-fall hazards for a link to a helpful guide on choosing the right ladder for any household task.


Watch Out for Outdoor Slip-and-Fall Hazards

Regardless of one’s age or occupation, performing outdoor chores or DIY projects pose a particular risk. If you don’t perform such tasks as cleaning gutters on a regular basis, you may not have the proper equipment that would allow you to do so safely. Many people have ladders that aren’t sturdy or appropriate for the job – or improvise with something unstable, such as a patio chair or stool. The Spruce has an excellent article on how to choose (and use) the right ladder for the task at hand. If you even occasionally use a ladder outdoors or indoors, it is well worth a few minutes of your time to read!

Even doing simple yard work can result in a slip-and-fall injury. Tripping hazards – such as an unseen branch on the ground in your path – or a slick patch of grass after a rainfall – can be enough to get you off-balance. So can wearing flip-flops, which don’t provide the necessary stability on uneven ground or slick surfaces (such as wet grass), or protection against injury. And don’t text or talk while walking! Find a place to stand or sit while you communicate on your phone. That old advice from your mom – keep your eyes open and watch where you’re going – is still important!

Yet, no matter how good your equipment or how vigilant you are, age remains a factor. When you’re deciding whether to take on a DIY project with an element of risk or hire a pro, be honest with yourself. Physical tasks that were perhaps easy for you to perform 20 years ago may be more challenging today. It isn’t worth trying to prove something to yourself if you wind up in the hospital – or worse. Enjoying a healthy, independent life is far preferable.


Preventing Slip-and Fall Accidents in the Workplace

Hopefully, your company follows all OSHA (Occupational Safety and Health Administration) regulations. But even those that enforce the strictest compliance can only do so much to prevent human error and negligence. Ultimately, being safe in the workplace is your responsibility.

The most basic safety measure is to be alert! Keep your head up and avoid distractions, such as texting or other cell phone use. Being aware of your surroundings to avoid hazardous situations is one of the best ways to prevent any type of accident.

The Timber Manufacturers Association provides the following precautions to prevent slip-and-fall accidents.


Slips:

  • Practice safe walking skills.
  • Take short steps on slippery surfaces and point your feet slightly outward.
  • Clean up or report spills immediately.
  • Don’t let grease accumulate on floors.


Trips:

  • Make sure you can see where you’re walking.
  • Don’t carry loads that you can’t see over.
  • Keep the workplace clean and tidy.
  • Properly maintain walking areas and report potential maintenance-related hazards.


Falls:

  • Don’t jump off landings or loading docks – use the stairs.
  • Repair or replace stairs or handrails that are loose or broken.
  • Keep passageways and aisles clear of clutter, and well-lit.
  • Wear shoes with the appropriate non-slip soles.


No matter what walk of life you’re from, following the safety tips we’ve featured can help ensure you continue to walk in good health! And if you’ve decided to be safe and leave your exterior home improvement projects to the pros, our team at The Paint Manager can help you achieve the great results you want for your Central Florida home. Learn more about our exterior services – including painting, roof cleaning, pressure washing and stump removal – then contact us to get started!

How to Use Outdoor Lighting as a Home Improvement

How to Use Outdoor Lighting as a Home Improvement

When it comes to the looks of your home, the first impression does make a difference, and a positive one can have a huge impact. A beautiful home exterior not only increases the curb appeal of your home, but it also says a lot about the attitude of the homeowner. And, it is basic human psychology to strive for more and better, be it your job or the way you keep your home. There is a lot that you can do to improve the look and feel of your house. For example, an exterior paint job, pressure washing the exterior of your home and outdoor lighting are all home improvement projects that can revitalize the look of your house.

While this article focuses on the benefits of residential outdoor lighting, here are the main benefits of exterior home improvement projects, as provided by home improvement contractor Windows on Washington:

It increases the value of your home – When you undertake a home improvement project, it certainly increases the value of your home. An attractive home exterior not just reflects well on the homeowner, but it also increases the curb appeal of your property.

It makes home maintenance easier – Everyone these days is short on time. Exterior home improvements can help you cut down on the time you need to spend on the maintenance of your home. For example, siding installation makes it easier for the homeowners to maintain the house as they don’t have to spend time on repainting the exteriors over and over again. Similarly, a new garage door and energy efficient replacement windows also make it easy for the homeowners to maintain their house.

Energy savings – This is another important consideration that encourages homeowners to take up exterior home improvement projects. For example, siding installation can reduce heating and cooling costs by as much as 20 percent. Similarly installing replacement windows can also reduce your energy bills substantially.

An exterior home improvement that’s growing in popularity is adding an outdoor kitchen. This trend is especially catching on in Central Florida, thanks to our favorable year-round climate and love for outdoor entertaining. Our friends at Seriously Smoked provide plenty of great outdoor kitchen ideas for spaces of every size, and projects and grills for every budget.

Home exterior lighting ideas

While many people don’t necessarily consider exterior lighting a home improvement, a well-planed system adds beauty and security to your property. Exterior lighting can do much more than line walkways or illuminate entryways. Artful use of outdoor lights can define entertaining spaces – such as a patio – as well as call attention to landscaping features.

Contemporist offers several ideas for outdoor lighting, which include:

String lighting – If you are looking for an inexpensive and easy way of lighting up your backyard and garden, you can use string lighting. You only need to string them up, connect them to a socket, and you are ready to spend some quality time at night in your backyard or garden.

Lanterns – You can also use lanterns to light up your garden and backyard. They are not just easy to place, but are available in a variety of styles to set any mood.

Strips of LED lights hidden under the furniture or base of your stairs – If you want to transform your outdoor spaces and make it modern, you can use strips of LED lights hidden under the furniture or along the base of the stairs.

Uplighting – Another way of making a style statement is to place lights under the trees and plants (positioned upwards). You can also place these lights on the walls (facing upwards). Uplighting helps create a sophisticated, dramatic effect.

Spheres and orbs – You can also use spheres and orbs to lighten up your garden and backyard. You can put them up individually or use them in cluster forms on the ground to set a contemporary mood.

Pendant lights – For homeowners who have a dedicated dining area in their backyard, pendant lights help define the space, as well as better illuminate place settings for meals.

Budget-friendly home exterior lighting ideas

Home improvement projects, especially outdoor lighting need not always dig a big hole in the homeowner’s pocket. There are many budget-friendly home exterior lighting ideas that you can use to make your outdoor spaces brighter and beautiful.


HGTV offers the following inspirations:

Create a moonlight effect – Use small directional lights in a large tree to create a moonlight effect. You can supplement it with candle lanterns around the tree which is an affordable and easy option that you can do without the hassle of wiring.

Use lanterns to brighten up your outdoor space – One of the easiest, attractive, and effective ways of lighting up your backyard and garden is to use decorative lanterns. You can use them in a cluster on the dining table, line them up on the wall, or put them up in groups. Wax candles or outdoor LED candles can be used in these lanterns to lighten up the outdoor space.

Chandelier – If you have a dining space in your backyard, you can use a chandelier to create a stylish dining atmosphere. You can suspend a candle chandelier from the beam or covered patio. For easy operation, you can use battery-operated LED candles. You can use string lights radiating from the chandelier’s mounting to create a magical experience.

Use step lights – You can light up your steps and walkways with solar-powered lights, which you can install yourself. Mount them on any flat surface or place them on the ground to give a modern look to your outdoor space.  

Create a romantic glow – Group flameless LED pillar candles wherever you want to set a magical mood – patio, porch or outdoor seating area.

Vintage-style lights – These Edison-style lights with exposed filaments adds more style quotient to your outdoor space. If outdoor party lighting is what you are looking at, then vintage-style lights can bring on the magic.

String lighting – Positioned at regular intervals, you can use overhead string lighting to illuminate your courtyard. You can also use copper DSE uplights to illuminate the shrubs, trees, and pottery. You can also use café lights in a string formation which adds a magnificent glow to your garden or backyard. If you don’t have trees and other tall objects in your backyard and garden, then you can use temporary planters and wood posts to hang these lights. Of course, they’re always ideal outdoor party lighting!

Use planters – Planters that glow from within are becoming popular as intriguing accents for yards and gardens. Most are solar powered so that you can display them anywhere.

Solar deck accent lights – Everyone’s all-time favorite, this is another way to brighten up your deck railing, post, or stairs. Solar deck accent lights can turn on automatically at dusk, and it is an attractive option to illuminate your backyard and garden.

To learn more about innovative outdoor lighting ideas, get in touch with The Paint Manager. You can also contact us for other outdoor and indoor home improvement ideas that can boost your home’s curb appeal!

Why You (or a Pro) Should Pressure Wash Your House

Why You (or a Pro) Should Pressure Wash Your House

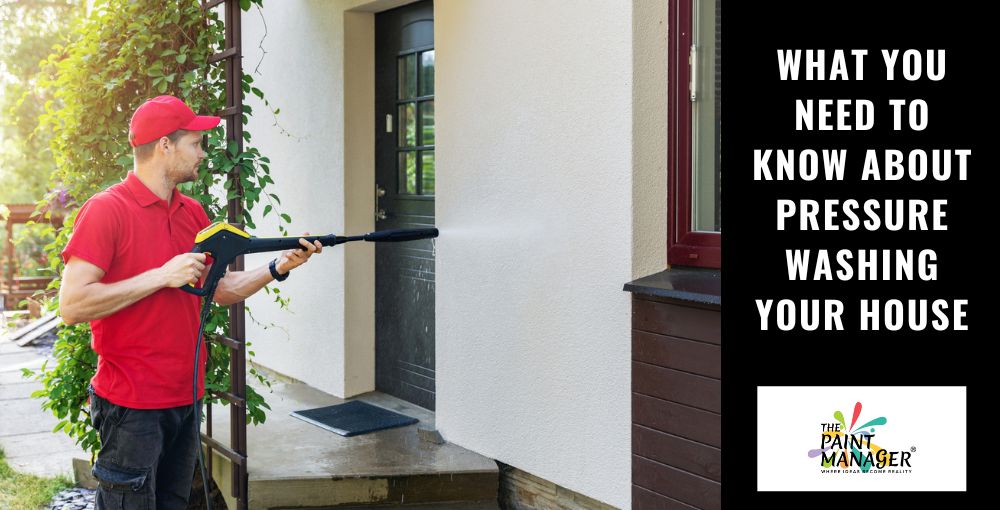
Ah, the joys of fall in Central Florida! As we ease away from worrying about hurricane season, temperatures begin to drop to the double-digits – making this the perfect time to get back to outdoor chores and home improvement projects before the thermometer dips even lower and it gets too cold for our thin Florida skin. Pressure washing (also called power washing) your house should be at, or near, the top of this list. Not only does a sparkling-clean abode show a sense of pride about yourself and your status in the neighborhood, it’s also a necessity to maximize curb appeal if you’re planning to sell, and to properly prep your house if you’re planning to paint.


If you can’t remember the last time you pressure washed your house, it probably could benefit from a good cleaning, no matter what your plans. It’s typical to not look at your home’s exterior closely, unless a problem becomes obvious. However, ignoring built-up grime, mildew, road dust (if you live on an unpaved street) and bird droppings not only creates a dingy appearance, but can actually damage your home and pose a health hazard. As noted by New Life Painting, mildew and mold continue to grow if left unchecked – and mold can grow within walls, meaning your home’s interior could be affected.


Do you dare DIY?


Pressure washing is one of those jobs that inexperienced, yet physically sturdy people often think they can take on themselves and save money. Of course, only you can judge your own capability to handle the equipment. Yet just because you may be able to wield the wand with ease, keep in mind that it can be hazardous if you aren’t familiar with how to work a pressure washer. Dangers include using too much pressure or the wrong nozzle – which can damage surfaces (such as siding, mortar and wood), break windows, and even cause injury. Improper use can also blast paint off, which means you’ll be repainting long before you intended. When it comes to safe, successful pressure washing, brain is as important as brawn.


Of course, hardcore DIY types probably already own a pressure washer, and therefore probably aren’t reading this. But if you’re generally handy with home maintenance and confident in your ability to tackle the task, renting the equipment at a home center is a good option. The advantage is in being able to talk to the rental associate, describe your house and get a recommendation on the type of pressure washer and accessories you’ll need. Being upfront with the associate about your experience level will result in the detailed, helpful advice and instructions that will allow you do to the best job in the safest way.


Once you’re set up and ready to start, become familiar with the wand or spray gun to work out the most effective spray pattern. You should use both arms to prevent fatigue. It is recommended to wash with the wand aimed downward, but there may be times you’ll have to aim it slightly up. As a general rule, work from the top down, and don’t spray water directly into cracks and gaps.


Safety first


Before getting underway, be sure you know how to use the pressure washer safely. Industrial equipment manufacturer Mi-T-M Corp. offers this helpful video of safety tips. Highlights include the following:

  • Read and heed all safety instructions on the equipment.

  • Wear safety goggles and closed-toe shoes.

  • If using an electric pressure washer, plug into a properly grounded GFCI outlet.

  • Place the pressure washer on a flat surface before starting.

  • Never point the nozzle at a person or animal; never come directly in line of the spray yourself.

  • Make sure the work area is clear of children and pets.

  • When not in use, hold the nozzle or gun assembly properly, so that water doesn’t accidentally spray.

  • When you turn off the pressure washer, release the pressure by squeezing the trigger before detaching hoses and nozzles.

  • Be careful before moving the pressure washer from one place to another, as the engine can get very hot.


Leaving it to the pros


If you’ve already decided that pressure washing is best left to the pros, The Paint Manager is ready! Our team has years of experience in power washing homes of all sizes, construction materials and ages to provide the best possible results. You can also contact us for innovative ideas on painting and repainting your home’s interiors and exteriors. We offer free estimates on all projects, and will be happy to help you take your home improvement plans to reality!

When to Paint the Exterior of Your House

When to Paint the Exterior of Your House

Painting your home’s exterior is perhaps the maintenance project that homeowners dread the most. Whether you choose to do it yourself or hire a professional, the task is expensive and nerve-wracking. If you’re like us here at The Paint Manager, you’re economy-minded, and consider any home improvement investment over $100 expensive. And although we pride ourselves on doing our jobs as quietly as possible, having people working on your property isn’t relaxing even under the best circumstances.


In Central Florida, the additional factors of intense heat punctuated by afternoon thunderstorms in the summer and hurricane season through November 1 compound the problem of finding a window of opportunity to accomplish this mission.


But first, let’s consider your motivation for painting your house. If you’re planning to sell, giving the exterior a fresh coat of paint is a sure way to boost curb appeal. This can also be the ideal time to update the colors to attract more interest among potential buyers. As with everything else, exterior colors go in and out of style – which means you want your house to look as up-to-date as possible. A newly painted house also creates the impression that the rest of the place has been regularly maintained and kept in good repair – and is therefore unlikely to present the new owners with nasty surprises.


If you’re planning to stay, this can still be a good opportunity to give your house an exterior makeover with an updated color scheme. However, your motive may be more than to create an impression – that is, you are regularly maintaining your home. Indicators that it’s time to repaint include:


  • Flaking, bubbling or cracking paint – These conditions often signal dry rot, wet rot or mold caused by failed weatherproofing. Strong sunlight, extreme humidity, storms, blowing sand and ocean breezes can contribute to the damage.


  • Hardened caulk – Caulking eventually loses its ability to expand and contract with your house. If the beads are hard and resistant when you press down, it’s time to recaulk – which typically means it’s also time to repaint.


  • Fading paint – Perhaps the most obvious sign. Sun bleaching is common, and dark hues tend to fade faster than paler shades. However, according to Nationwide, fading on shady sides of the house indicates problems with the vapor barrier or with water intrusion. Look for stains dripping downward on the paint. If water-soluble materials designed for home interiors end up outside the house, it’s a sign of water leaks. If you can’t pinpoint the source, call an expert.


  • Morphing paint color – Did your home’s color morph from sedate beige to pink? Blame ultraviolet (UV) rays, which can sometimes transform paint to an unexpected or undesired shade. To prevent this, make sure the paint is an exterior grade that can withstand UV effects.


  • Patching stucco – Stucco exteriors were popular in Florida in the 1990s, but fell out of fashion due to problems with the material adhering to the concrete block it was applied over. To minimize costs without re-stuccoing the entire house, patch stucco cracks and repaint the whole house. Otherwise, homeowners will be left with streaks or a patchwork from paint that doesn’t quite match.


The quality of the paint and painting materials you choose makes a significant difference in the durability of your exterior paint. Selecting high-quality paints and painting materials will ensure that your paint job lasts longer. Equally important is performing detailed prep work, should you decide to go the DIY route. Clean and sand the surface so paint adheres to it properly. Apply two coats for greater durability and longer useful life.


Now comes the question: How often should your paint your house? Assuming you don’t wait for it to acquire a weather-beaten appearance, the answer is: It depends on some variables – your region, climate and weather conditions, your home’s construction materials and the quality of those materials.


For example, houses with wood siding may require a repaint every three to seven years; every four years if it is stained. Other time frames are:


  • Stucco – 5 to 6 years
  • Brick – 15 to 20 years if painted; occasional pressure washing if not
  • Cement fiberboard siding – 10 to 15 years


If you are planning to have your home exteriors (and interiors) painted, and you need a professional home painting contractor, get in touch with The Paint Manager. Select the perfect color from our color picker page, or contact us for innovative house painting ideas!

Go Top
Skip to toolbar